Thinking about listing your Camas home this year? Smart staging can make your place feel brighter, bigger, and more move-in ready to the buyers who are actively looking in our area. You know your home best, and a few focused updates can help it stand out without overspending or overhauling everything. In this guide, you’ll get a clear 60–120 day plan, room-by-room priorities, photo-day tips, and curb-appeal ideas that fit Camas and the Pacific Northwest. Let’s dive in.
What Camas buyers notice first
Buyers in Camas often look for practical, comfortable living with a touch of modern style. Many value usable outdoor space, natural light, storage, and homes that feel well cared for. They also appreciate proximity to parks and trails, including the Lacamas Lake area, and a welcoming, easy-flow floor plan.
Focus your staging on these buyer-friendly themes:
- Indoor–outdoor flow: Open sightlines to patios, decks, and yards. Keep doors and windows clean and easy to open during showings.
- Low-maintenance landscaping: Tidy beds, pruned shrubs, fresh mulch, and clean gutters are important in our PNW climate.
- Warm, neutral styling: A slightly contemporary look with neutral colors reads well in photos and in person.
- Move-in ready cues: Small cosmetic fixes, clean finishes, good lighting, and organized storage make a strong impression.
60–120 day staging plan
You can do a lot in two to four months. Use this phased plan to stay on track and book pros with enough lead time.
Phase 0: Pre-plan (days 0–7)
- Walk through your home and make a room-by-room list of priorities.
- Decide where to invest: paint, lighting, hardware, landscaping, and deep cleaning.
- Book a stager consult and a real estate photographer. Popular pros often need 4–6 weeks’ notice.
- Order materials early so you are not delayed later.
Phase 1: Declutter and repairs (weeks 1–3)
- Remove extra furniture to improve flow. Store off-site if needed.
- Clear surfaces, personal photos, and refrigerator magnets.
- Handle small fixes: patch and paint touch-ups, replace bulbs, re-caulk and re-grout as needed.
- Start a deep clean of kitchens, baths, windows, and baseboards.
Phase 2: Cosmetic updates (weeks 2–6)
- Paint key rooms in neutral tones that suit natural light.
- Refresh kitchen and bath details: cabinet hardware, upgraded faucet, under-cabinet lighting.
- Tidy the yard: prune, mulch, edge beds, and pressure wash paths and driveway.
- Address any flooring touch-ups or replace worn rugs with neutral options.
Phase 3: Staging and styling (weeks 5–8)
- Arrange furniture to highlight a focal point and show clear walkways.
- Add simple, neutral textiles and art that photograph well.
- Stage outdoor areas with clean seating and a small table to show lifestyle use.
Phase 4: Photos and listing prep (weeks 7–10+)
- Schedule photography on a bright day. Aim to finish staging 24–48 hours before the shoot.
- Complete a final clean. Hide bins, pet items, and personal toiletries.
- Prepare open-house materials and showing instructions.
If you have up to 120 days, use the extra time to secure contractors, complete larger landscaping projects, or consider a pre-inspection for peace of mind.
Room-by-room priorities that photograph well
Use these practical, photo-friendly tips to help each room show its best.
Entry and foyer
- Keep a clear path with one small console and a mirror to bounce light.
- Add a neat place for coats or showcase hidden storage.
- Photo tip: Capture the entry with a glimpse into the main living area to show flow.
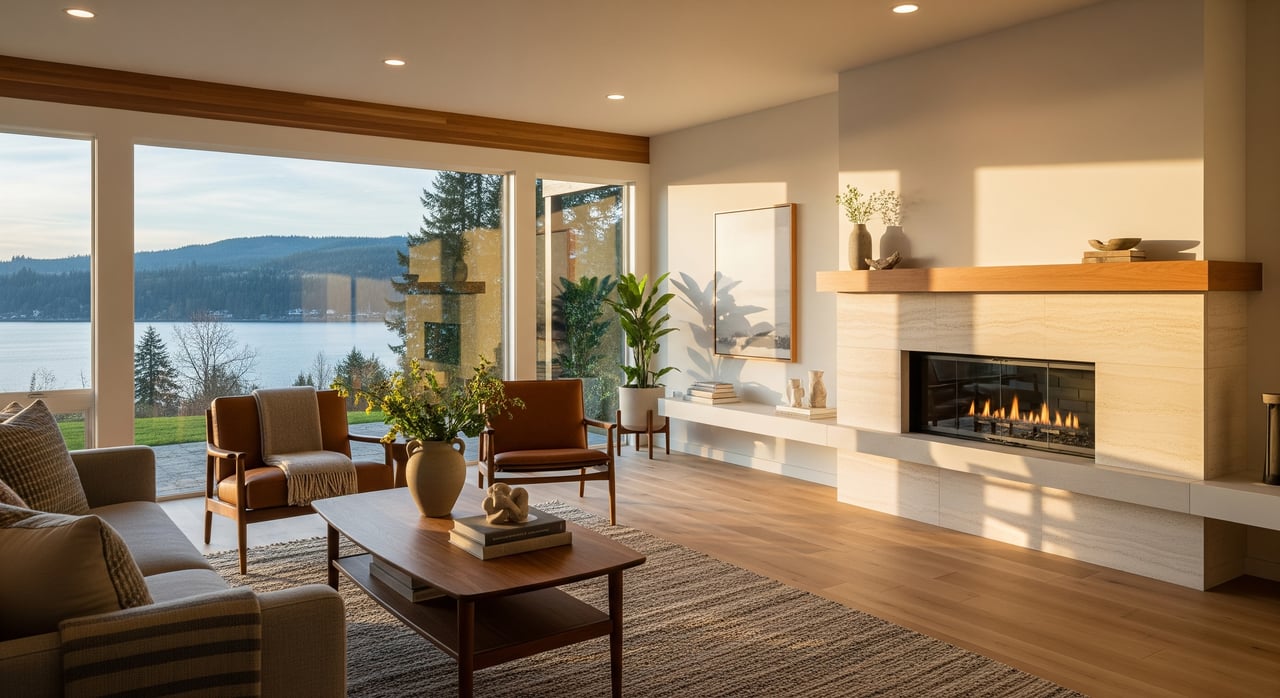
Living and family rooms
- Center furniture around a focal point like a fireplace, view, or TV wall.
- Remove bulky pieces and use a neutral area rug to define the space.
- Add two matching lamps to eliminate dark corners and balance backlighting.
Kitchen
- Clear counters, leaving only one or two styled items such as a bowl of lemons or a small plant.
- Clean and stage the sink area with a fresh towel. Show pantry or cabinet organization.
- Consider small refreshes that shine in photos: new hardware, under-cabinet lighting, and a modern faucet.
- Photo tip: Shoot from a corner to reveal the work triangle and sightlines to dining or the backyard.
Dining area
- Set a simple, neutral tablescape. Keep surrounding areas clear of clutter.
- Right-size the number of chairs so the space feels open.
- Photo tip: Use a single centerpiece to guide the eye and remove extra furniture that crowds the room.
Primary bedroom
- Aim for a calm retreat: centered bed, neutral layered bedding, and clear nightstands.
- Thin out furniture to emphasize square footage. Organize closets to show storage.
- Photo tip: Use natural light. Three layers on the bed add a finished look.
Bathrooms
- Replace tired caulk or grout and polish glass. Keep counters nearly bare.
- Add fresh white or neutral towels and a small plant or candle.
- Photo tip: Remove all shower toiletries and ensure mirrors and fixtures sparkle.
Home office or flex room
- Stage as a clear workspace with a tidy desk and chair. Hide cords.
- If needed, show an alternate use such as a playroom or guest space.
- Photo tip: Highlight natural light and a clean, organized surface.
Secondary bedrooms
- Keep bedding neutral and avoid heavy themes.
- Show closet storage and remove extra toys or oversized pieces.
- Photo tip: Consider staging one secondary room as a flex space to widen appeal.
Laundry and mudroom
- Organize with baskets and hooks. Clear surfaces and floors.
- Show the flow from entry if applicable, especially for family buyers.
- Photo tip: Present a bright, clean utility area that feels practical.
Garage and storage
- Remove clutter and sweep floors. Add simple shelving where useful.
- Leave space for at least one car if possible.
- Photo tip: Use a wide-angle shot to communicate usable storage.
Backyard and outdoor living
- Clean decking and patios. Stage a seating vignette with a couple of chairs and a small table.
- Trim hedges, remove toys, and show healthy lawn areas.
- Photo tip: Shoot during softer light. Include interior-to-exterior views to emphasize flow.
Curb appeal for the Pacific Northwest
Camas curb appeal is all about a clean, welcoming entry and well-kept landscaping that suits our climate.
- Front entry: Refresh the front door and hardware if worn. Add a new welcome mat and potted plants.
- Hardscapes: Pressure wash concrete and repair cracks. Define edges with mulch or simple plantings.
- Landscaping: Prune shrubs, lay fresh mulch, and add seasonal color. Choose PNW-friendly evergreens and perennials.
- Exterior cleaning: Clear gutters, wash siding and windows, and touch up trim.
- Lighting: Update porch and path lights for a warm, safe feel at dusk.
- Roof and gutters: Address visible roof issues or disclose them and price accordingly.
Seasonal ideas:
- Spring and summer: Emphasize lawn health and flowering planters. Open doors and windows during showings when weather allows.
- Fall: Keep leaves cleared and walkways safe. Add warm textiles and soft outdoor lighting.
- Winter: Keep entries dry and tidy. Use bright indoor lighting and remove snow or ice promptly when present.
Lighting and photo-day checklist
Great photos start with great light and tidy details. Plan ahead for the shoot.
- Turn on all lights and replace dim bulbs.
- Open blinds and curtains fully. Clean glass inside and out.
- Align rugs, fluff pillows, and make every bed hotel-tight.
- Hide trash and recycling bins, pet bowls, litter boxes, and personal toiletries.
- Remove cars from the driveway and sweep porches and paths.
- Place fresh flowers on the dining table and a bowl of fruit in the kitchen.
- Set a comfortable thermostat so showings feel inviting.
Budget options and who to hire
Choose the level that matches your timeline and goals. Often, small cosmetic fixes and thorough decluttering deliver strong results within 60–120 days.
- DIY low-cost: Declutter, deep clean, rearrange furniture, paint a few rooms, and add plants and soft furnishings.
- Mid-tier: Hire a painter for a whole-house neutral coat, book a professional deep clean, bring in a handyman for minor repairs, and hire a landscaper for cleanup.
- Full-service: Work with a professional stager and furniture rental, consider a landscape refresh, and complete selective cosmetic updates in kitchens and baths.
Helpful vendors to line up:
- Stager or staging consult, real estate photographer, deep-clean crew, painter, licensed handyman, landscaper, and electrician or plumber for fixture and safety work.
Book your photographer early and plan to have staging finished 24–48 hours before photos.
Permits, inspections, and disclosures
Most cosmetic staging and small repairs do not require permits. Structural changes, new decks, or major electrical and plumbing work generally do. Check City of Camas and Clark County guidance before starting larger projects.
Buyers here commonly order home inspections. Do not conceal known issues such as moisture, roof damage, or foundation concerns. Fix what you can or disclose clearly. A pre-listing inspection can help you prioritize repairs and avoid surprises later.
Quick staging consult checklist
Use this room-by-room checklist to guide your final walkthrough.
- Exterior: Roof and gutters, front door, porch, driveway, lawn or beds, lighting, mailbox.
- Entry: Clear walkway, console table, mirror, bulb replacements.
- Living room: Furniture layout, focal point, correct rug size, window treatments, lamp placement.
- Kitchen: Clear countertops, staged sink, cabinet pulls, task lighting, organized pantry.
- Dining: Simple table styling, clear chair arrangement, clean light fixture.
- Primary bedroom: Bed position, layered bedding, tidy closets to show storage.
- Bathrooms: Fresh towels, clear counters, refreshed shower and caulk, bright mirrors and lighting.
- Home office: Tidy desk setup, hidden cords, designated spot for Wi-Fi equipment.
- Laundry and mudroom: Durable mats, hooks, clean washer and dryer.
- Garage and storage: Remove clutter, add shelving if useful, sweep floors.
- Photo day: All bulbs working, curtains open, fresh towels or flowers placed, bins hidden, driveway clear.
Ready to list with confidence
Staging for Camas is about simple, smart choices that highlight light, storage, and indoor–outdoor living. With a clear plan and the right pros, you can launch your listing with strong photos and a warm, move-in ready feel that resonates with local buyers. If you’re weighing where to spend and what to skip, let a local expert help you prioritize.
Reach out to Karen Higgins for a friendly walk-through, a tailored 60–120 day plan, and a free home valuation so you can move forward with clarity.
FAQs
What are the top staging priorities for Camas sellers?
- Focus on decluttering, neutral paint, improved lighting, tidy landscaping, and clear indoor–outdoor flow to align with local buyer expectations.
How far in advance should I start staging in Camas?
- Start 60–120 days before you list so you can declutter, complete cosmetic updates, book pros, and stage before professional photos.
Do I need permits for staging updates in Camas?
- Cosmetic work usually does not, but structural changes, new decks, or major electrical and plumbing often do; check local city and county rules first.
How do I stage for winter showings in Camas?
- Maximize light with bright bulbs and open shades, keep entries dry and clean, add warm textiles, and ensure paths are clear of ice or snow.
Should I hire a professional stager or DIY in Camas?
- Many sellers succeed with DIY plus a consult; if time is tight or rooms are vacant, a full-service stager and rental furniture can be worth it.